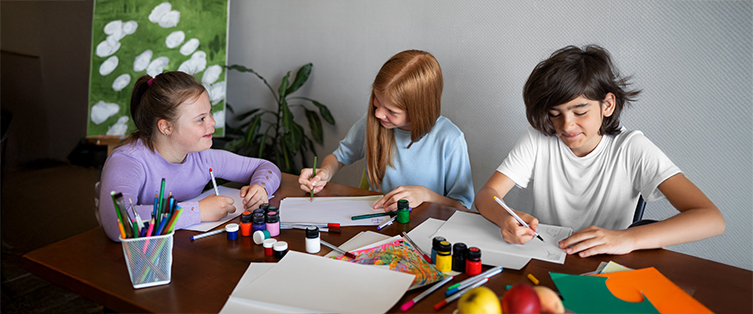
Do-It-Yourself, or DIY, projects are a fun and cost-effective way to make improvements around the home. Creating customised furniture, functional arts and crafts, and other projects can also make for a great hobby. Pinterest and other sites can inspire great ideas for projects, and there are many DIY courses to help you learn how to complete them.
Why Learn to DIY?
For millennia, DIY was one of the few options for people who wanted furniture or household art and decor. Modern trade practices have almost eliminated the need for DIY, but for those who have continued the craft, there are a lot of advantages to knowing how to complete projects yourself.
Cost-effective
While paying for professional services such as plumbing, electric, or construction can be necessary for many situations, learning DIY projects around the home can save you money in the long run.
Skill building
The more DIY classes you attend, the more knowledge you will have. Building skills you can use around the house can translate well into everyday life.
Improved confidence
Learning to DIY improves confidence in your abilities as a problem-solver and as a creator.
Discover a new hobby
DIY projects can lead to the discovery of a passion you may not have been aware of before.
Spend time with friends and family
Arts and crafts projects create an opportunity for bonding.
Realising your own aesthetic vision
Sometimes, obstacles like cost and availability can prevent you from creating the space you want. Learning to DIY can remove those obstacles and help you achieve your aesthetic goals.
What are Some DIY Ideas?
Depending on your needs, available workspace, and budget, some DIY crafts might make more sense than others. Many people exclusively enjoy arts and crafts, while others are always looking for ways to improve the function of their space. A quick search online can help you decide on a project, and DIY course instructors can also help you get started. Some ideas for curious crafters in Dubai include string art, decoupage, and apartment balcony projects.
String Art: How to Do it Yourself
String art has become a popular DIY craft in recent years. As an inexpensive form of art, the craft is a great way to personalize the space in your home. String art is also a popular gift for family and friends, regardless of age. In fact, taking a DIY string art class with a few friends, your partner, or even the whole family is a perfect way to spend quality time together. While your instructor will likely provide you with any materials you may need, most string art supplies include:
- Corkboard, wooden block, or canvas
- Pins or nails
- Cotton string or embroidery thread
- A hammer, scissors, tape, glue, pen, and paper
Once you have gathered your supplies, the next step in creating string art is to choose a design. Many DIYers choose simple designs, such as hearts or abstract shapes. Looking up ideas online can help with the process. Once selected, trace the design on a piece of paper, then cut it out.
Affix your design to your board, block, or canvas with tape, then work on nailing down your pins. Follow the pattern provided by your design cut-out, lining the nails around the outside of your shape.
Remove the paper design from the surface, and decide what kind of pattern to make with your string. You can thread the string symmetrically, haphazardly, or create a new pattern all your own.
Tie down the end of your string to the first pin, dabbing on a bit of glue to keep it secured. Weave the string around the rest of the pins until you are satisfied with the completed design.
When you are finished, tie the string around the last pin and cut away any excess string. Dabbing a bit of glue here will help keep the piece intact.
If you are happy with the results, you can hang your new artwork or gift it to a loved one. However, if you are unsatisfied with your at-home string art, it may be best to attend a DIY class with an experienced instructor.
Decoupage: Up-Cycle Old Furniture
Decoupage is a form of crafting that involves paper, glue, and varnish. The term stems from the French verb découper, which means “to cut out.” It is a versatile way to spruce up old furniture, style a space, or create unique, functional art pieces yourself. While DIY decoupage can look intricate and detailed, the process is fairly simple and does not require many supplies:
Object surface
Decoupage is applicable on almost every type of surface: glass, wood, metal, plastic, and more. Crafters often use boxes, vases, kettles, furniture, frames, mirrors, plates, and even interior walls. Some like to upcycle old furniture or stylize new lamps, trays, and other home decor.
Paper
Gift wrap, designer tissue, magazines, colored paper, and even fabric can be used to decoupage; there are virtually no limitations. It is important to cut your designs carefully before applying them to the desired surface.
Glue
There are a few different options for decoupage glue. Spray glue is the most convenient, as it is easy to use and dries quickly. PVA glue works for many types of materials and dries clear. Specially formulated decoupage glue works well as both glue and varnish.
Gloss varnish
Varnish is added to the whole decoupaged surface to seal it. Using a gloss varnish prevents cloudy results.
Tools
Use scissors and a craft knife to cut out designs and brushes to apply glue and varnish. A soft sponge will help to wipe excess adhesive, and a cloth will help keep your hands and workspace clean.
Considered less tedious than some other types of arts and crafts, decoupage is a fun and relaxing way to spend time – alone or with friends. It is also a useful skill that can be applied to many areas of life.
DIY Apartment Balcony Projects
DIY experts know how to make use of every corner and surface, especially in areas where space is limited. For many living in Dubai, apartment balconies offer many opportunities when it comes to DIY projects. Smaller balconies are the perfect size for an outdoor herb and vegetable garden. Wide balconies usually have enough space for a patio or at least a few pieces of furniture.
One thing that most balconies do not offer, however, is privacy. Fortunately, DIY privacy screens can be simple and inexpensive to install. Depending on the balcony’s construction itself, there is a wide range of options for privacy screen assembly:
- Artificial hedges or ivy
- Bamboo fencing
- Canvas or mesh screen
- Curtains
- Frosted window film
- Reed grass
- Trellis
- Wood screen
After installing your privacy screen, you can transform the space into anything you want. Many people plant versatile gardens around patio chairs for a makeshift getaway, while others repurpose their balcony space regularly. Regardless of the size, balconies offer many options for DIYers.
DIY Classes are Available to Book Online
While some projects can be completed after watching a tutorial or two, other skills are best developed by an experienced guide. DIY experts offer classes online and in-person, and can help make the experience more enjoyable than learning on your own. Courses are conveniently available to book online for anyone living in Dubai.


Leave a Reply